
When your water heater starts causing issues, it can be difficult to know how to troubleshoot. Some of the most common issues include not getting enough hot water, loud noises, and rusty water.
Generally, Cincinnati Water Heater Repair needs to be addressed by a licensed plumber. However, there are a few things you can do to help the problem until they arrive.
There are a few things that can go wrong with electric water heaters. The heating elements may fail, the high temperature cutoff may trip, and sediment can build up in the tank. The thermostats can also go bad, causing the heater to overheat. Fortunately, most of these problems are relatively simple to fix.
To begin with, make sure the breaker in your service panel hasn’t tripped. This is a common problem that causes a loss of hot water. The circuit breaker can be reset by turning it off and then on again.
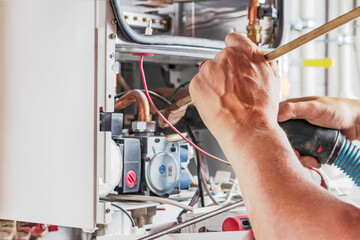
Next, shut off the power to the heater at the breaker box and post a sign telling others not to turn it on. Turn off the breaker for the electric water heater in your service panel. Remove the access panel to the upper heating element on the heater and remove the plastic safety guard and insulation, being careful not to touch any wire or electrical terminal. Push the red button-the high-temperature cutoff reset button-located above the upper thermostat.
Thermostat problems are usually caused by an electrical short between the thermostat’s metal strip and one of its contact points. When the thermostat is hot, it bends the strip down slightly, forming an ohmic (resistance times 1,000) connection between the two. As the thermostat cools, it springs back up to its original position, making the contact point complete and allowing electricity to flow through the contact point. When the thermostat reaches a higher temperature, the strip coils go up and the contacts make another ohmic connection. The contact points then send a signal to the switch in the wall that turns on the heater.
When the contact points fail to make a good connection, it causes a constant current to run through the wires and can burn them. Over time, this will deteriorate the wires and cause them to fail as well.
The best way to determine if the thermostat is open is with an ohmmeter. The test requires disconnecting the upper and lower heating elements, so a replacement will be necessary if the test indicates failure. Make sure to purchase a replacement that is the same size and model as the old element. It is also a good idea to wrap the new element with Teflon tape or apply pipe dope around its threads to ensure a waterproof seal.
Element
If you’ve noticed your water heater isn’t producing enough hot water, it could be the result of a broken element. Water heater elements are responsible for heating the water within your tank, so when they break down, it’s likely your water will not heat at all or will be too hot to use safely.
Fortunately, replacing a water heater element is a relatively easy task that many homeowners can complete on their own. Regardless of the type of water heater you have, the first step is to turn off power to your water heater by shutting off the circuit breaker or removing the fuse that controls the circuit. It’s importante to remember that you’re working con electricity and water – two things that do not mix, so safety is paramount.
Once the power has been turned off, the next step is to drain the tank. This can be done by attaching a hose to the drain valve and opening it. Once the water is drained, it’s a good idea to flush out the entire system with a solution that removes any sediment that might be present in the tank.
One of the most common reasons for water heater failure is due to mineral deposits that build up over time inside your tank. These deposits clump together at the bottom of the tank, reducing efficiency and potentially shortening your water heater’s lifespan. Home improvement experts recommend performing preventative maintenance on your water heater each year to reduce the risk of these problems. This includes inspecting the anode rod and temperature release valve to ensure they’re in good condition.
If you suspect the heating element is broken, you can replace it by following these instructions: Remove the wires connecting the element to your water heater’s control panel. Loosen the screws holding the element in place by turning them counterclockwise with a ratchet wrench and 1 1/2-inch socket. Some repair kits include a socket that fits the element. After the screws are removed, remove the gasket that seals the element to the tank. Once the old element is removed, replace it with a new one of the same voltage and wattage as the original.
Dip Tube
Your water heater’s dip tube performs a vital function that helps prevent sediment buildup in the bottom of the tank. It also brings cold incoming water directly to the burner located at the bottom of the tank. Without it, you might not have hot water for showers or laundry. If you have a heater that is old or in need of repairs, you might notice your water heater’s dip tube beginning to break down and become cracked or full of holes.
The tubes themselves are prone to corrosion since they are submerged in water of different temperatures and mineral content. Some manufacturers use a curved dip tube that creates swirling action as the water travels through it, which may help reduce the amount of sediment that accumulates inside the tank. The curved tube may also improve your overall water quality as it can filter out some impurities that could otherwise make their way into your home’s plumbing.
You can replace a water heater dip tube fairly easily. First, drain a few gallons of water from the hot water heater through a garden hose attached to a spigot at the nipple (see this guide on ‘How To Drain A Water Heater’). You can then purchase and install a new nipple-attached dip tube. It’s important that the new dip tube be a close match to your existing one in size. Some newer units with the cold water inlet on the bottom of the unit do not have a dip tube.
You will know it’s time to replace your water heater dip tube if you start to notice that you don’t have as much hot water for showering or that your laundry isn’t getting very warm. You might also see that your sacrificial anode is corroding faster and producing a sulphur smell in your hot water.
Pressure Valve
The pressure/temperature relief valve is a safety device designed to open at a preset pressure and discharge water until the system overpressure reaches acceptable levels. The valves are usually welded to the top or side of the hot water heater tank and connected to a plastic or metal discharge tube that points up. The valve has a handle that is turned clockwise to open the valve and counterclockwise to close it. The pressure/temperature valve should be inspected and replaced at least annually.
The valve works by using a spring-loaded “poppet” valve element with an elastomeric (or in high pressure designs, thermoplastic) seal configured to make a seal on the valve seat. The pressure of upstream fluid and the force of the spring combine to apply a constant force on the poppet, keeping it sealed against the valve seat. When the pressure of the upstream fluid exceeds the spring force, the pressure on the poppet increases and the valve opens. When the upstream pressure drops below the set point, the spring retracts and the valve closes.
To increase the pressure capacity of the valve, a secondary control chamber or huddling chamber can be installed on the body of the valve to enhance lift. It is also important that the elastomer selected for the sealing surface be compatible with the fluid and expected operating temperature range.
When a pressure/temperature valve is not working properly, the water heater will often develop leaks around the valve mounting threads on the tank or at the pipe connections to the valve. The leaking water can damage the insulated tank and may result in hot water stains or spots on the floor around the tank.
Before attempting to check or replace the pressure/temperature valve, shut off the electricity to the hot water heater. It is extremely dangerous to attempt any electrical or plumbing work on a live water heater and could create a risk of personal injury or property damage. Also, turn off the water supply to the heater and drain the tank by turning the valve on the bottom of the tank to the drain position.